 |
|
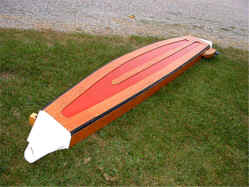 |
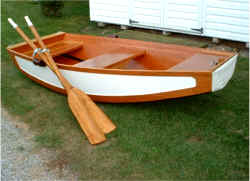
a folding dinghy sailboat |
 |
|
barquito: Spanish for little boat |
I have always wanted to build a boat. But the time was never right. The matter of storage, transporting and cost have always kept me from this project.
I looked at various types of boats: kayaks, pirogues, dories, canoes and even sneak boxes. Each kind has its own advantage and purpose. I didn't want a beach cruiser, or a camping boat. I didn't want a working boat, or even a serious fishing boat. I realized what I wanted was an inexpensive boat that I could use on the lakes at nearby state parks. I wanted a boat that I could sail, row or even paddle if I had to.
I think part of the fascination with boats comes from the reality that you can't have it all in a single boat. The design of every boat is balance, and even a compromise, of many factors. Some of these parameters can be predicted by an amateur builder like me, and some are unknown. For me, this is part of the fun of thinking about boat plans.
Eventually I saw plans for a folding sailboat. From the start, this idea really intrigued me. How does it fold and remain water tight at the same time? Was it safe, practical, easy to use? How would it perform as a boat? Bill Weller, the designer of this folding sailboat plan, called it a "Flapdoodle." Check out his official website here: http://flapdoodledinghy.com
The author of the boat plan says that he devised this after years of experimenting and modifying this design. The boat is an eight foot dinghy. It is a small boat by most standards. I was fascinated by the peculiarities of this design. I wanted to see what this little craft was like and how it would take to the water. If it worked, I thought it might be my answer to owning an inexpensive row/sail boat that was easy to store, transport, launch, and fun to "just mess around in."
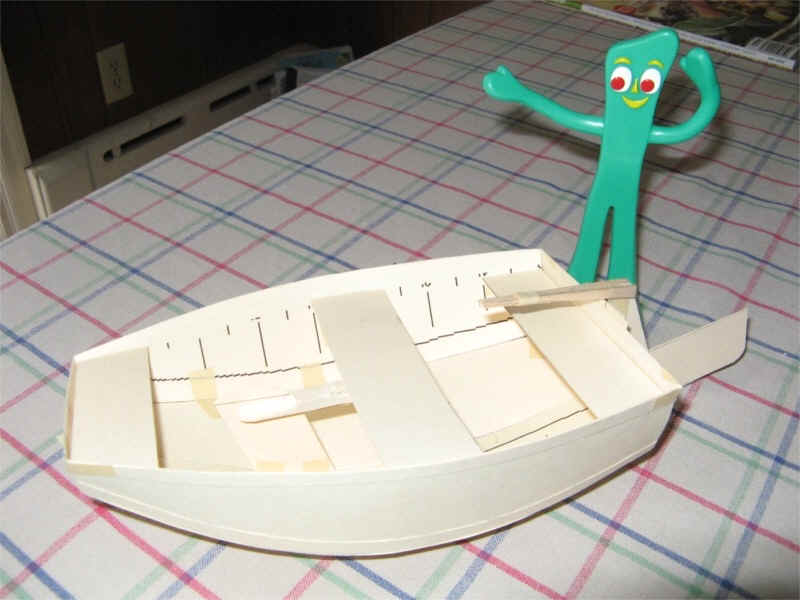
I bought the plans and got started. In order to understand how the pieces of this boat fit together, I built a scale model out of paper. Gumby liked it, so I decided to build a real one.
I decided to build this dinghy out of 1/4" luan from Home Depot. This decision was based on several things: 1) recommendation as one of the options in the plan, 2) the low price of exterior grade luan, 3) also the fact that for my purposes this boat would be in the water only occasionally, a few hours at a time. As a hobbyist, this seemed reasonable. To the professional boat builder even thinking about a luan hull might seem like heresy. The reason is that most luan is of variable quality and therefore a poor, unreliable material for critical components like the hull.
I waited until a shipment came to the lumber yard that had very few voids in the plies as I viewed the stack of luan sheets from the side. In this particular shipment I saw only one void. My reasoning was that this might indicate what I couldn't see inside the plywood. So I purchased three sheets of the best exterior grade luan plywood I could find. I was ready to build a boat.
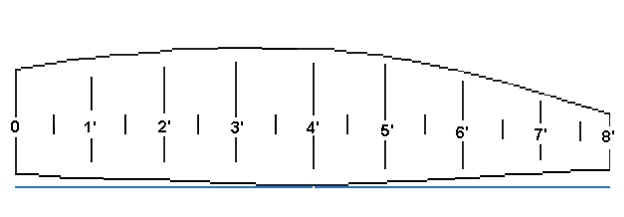
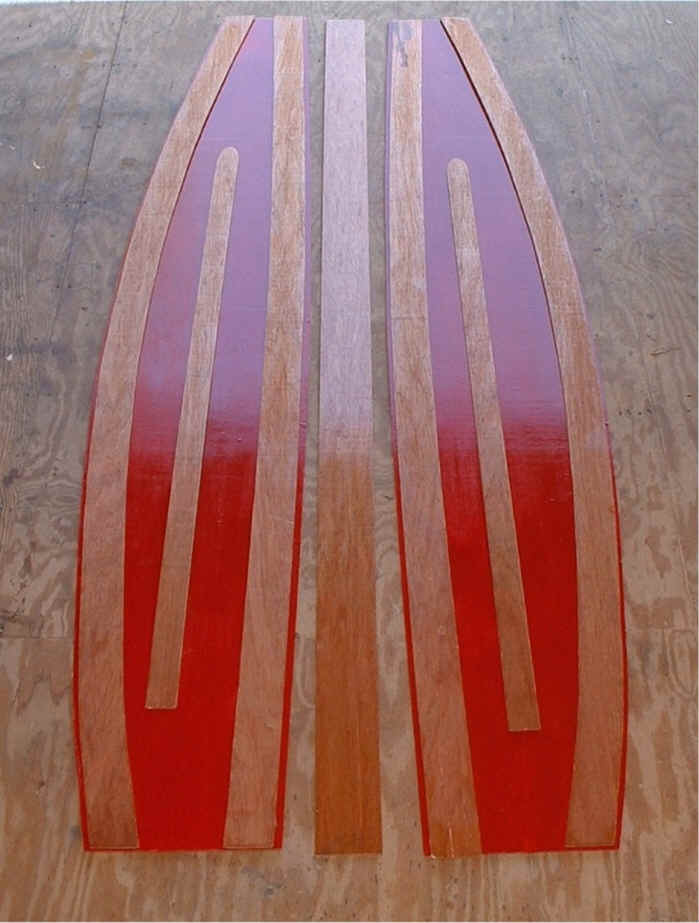
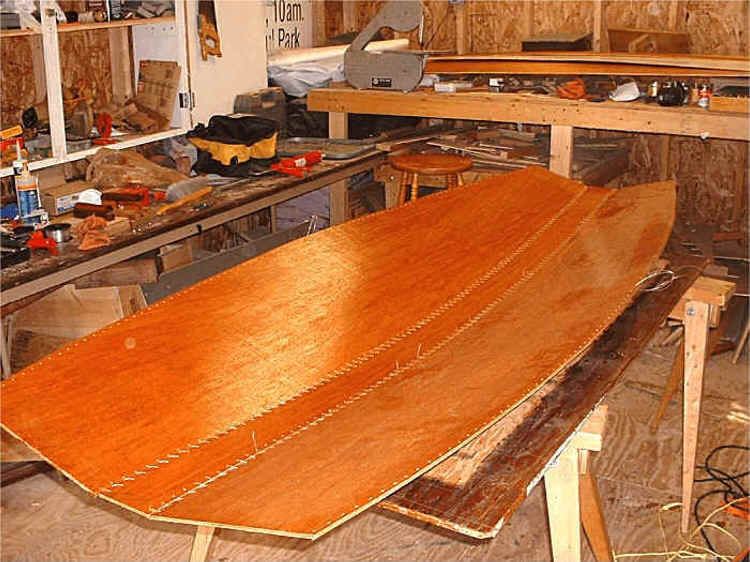
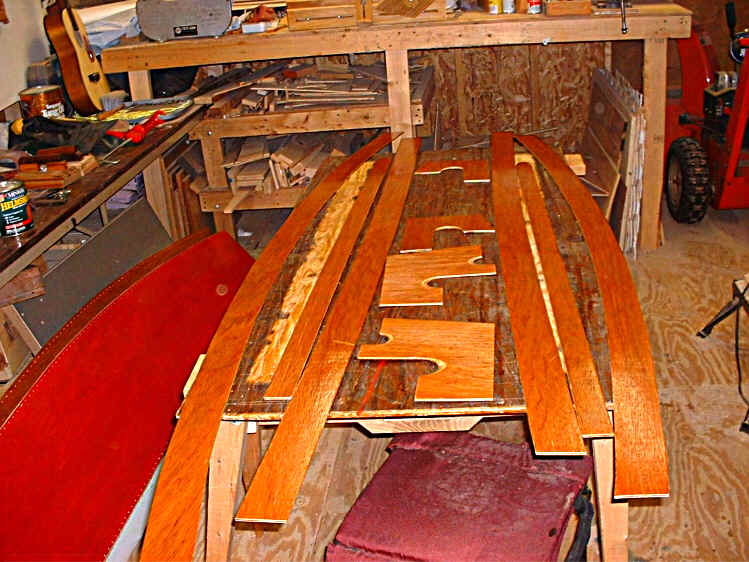
The boat is based on a keel plate and four hull plates. Each of the hull plates is dimensionally the same. One of them is illustrated above. Contact the designer of this plan for the layout dimensions.
I read the plans through three times before I started then I began by cutting out the keel plate, hull, and reinforcing pieces. After all these pieces were cut out according to the plan, I found only two voids. I filled these with a simple epoxy wood filler. Each part that went into the assembly of the boat was lightly sanded. I brushed on a coat of exterior spar urethane. Then I sanded a small radius (rounded) all the edges that would join at a hinge. The next step was to brush on two more coats of exterior spar urethane.

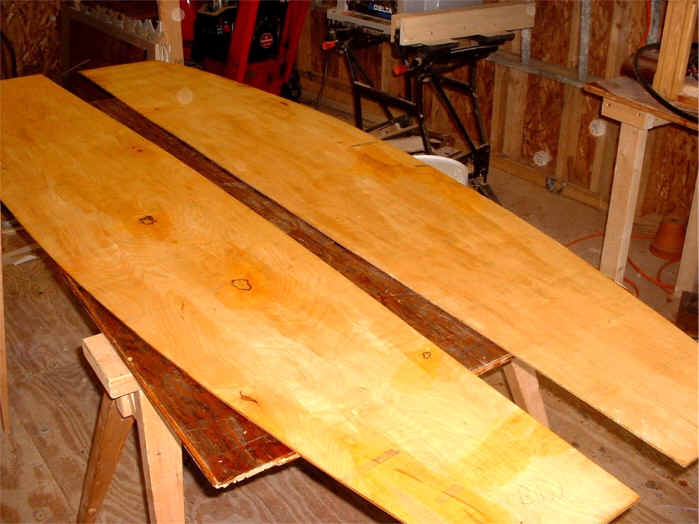
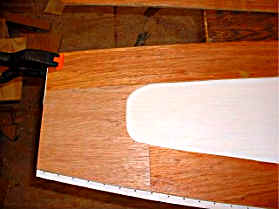
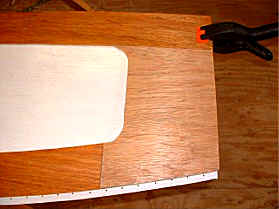
Here is a picture of port and starboard pieces of the hull. The outside of the hull is facing up.
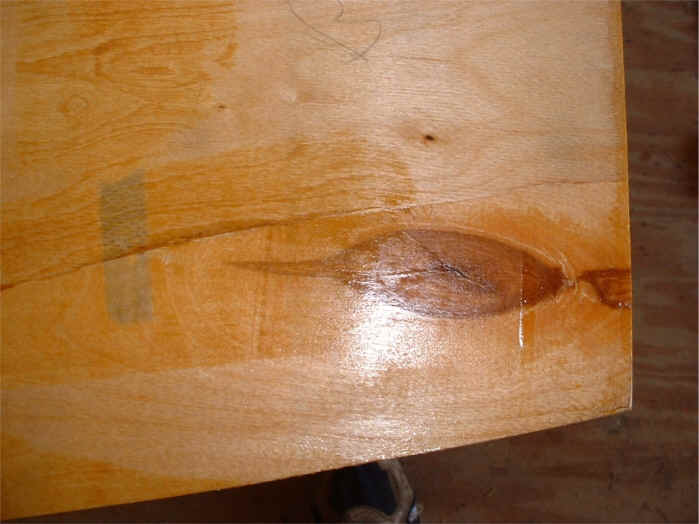
This picture shows the worse knot in the luan I purchased. When I layout the lines for cutting this piece, I made sure that this knot would be in the bow, where it would be out of the water.
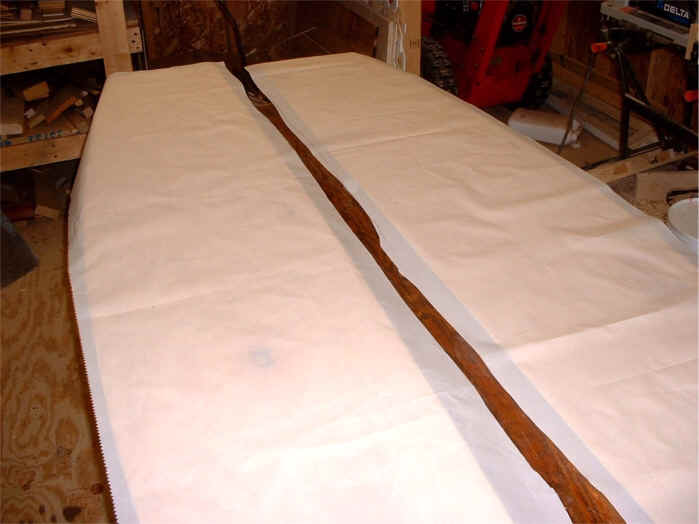
According to the plan designer, one option was to cover the hull pieces with Dacron fabric (polyester). This provides an added degree of protection against penetration of water and from abrasion by underwater objects. I found the fabric on sale at Wal Mart! Here the Dacron is rough-cut and ready for application to the hull.
Most boats of this type are built using fiberglass and epoxy. This is a tried and proven method that results in very durable all weather boats. Gluing Dacron to a hull is a less expensive, easier, quicker method. It does not compare to the durability of fiberglass. But the result is a serviceable boat you can mess about in.
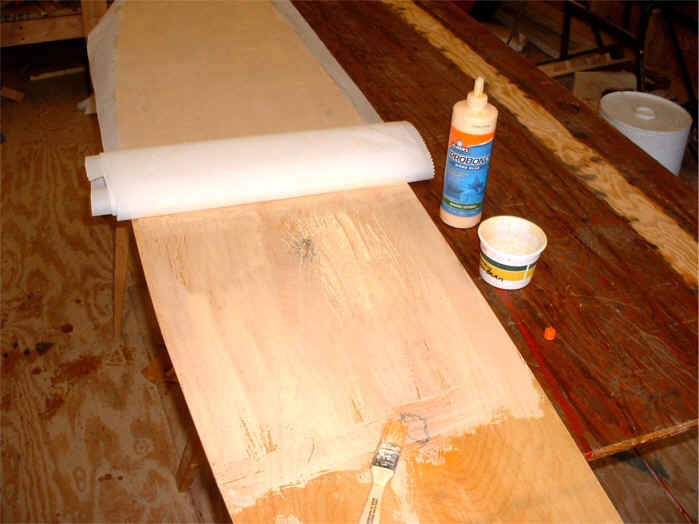
I applied the Dacron to the outside of the hull pieces using diluted Elmers ProBond glue and a brush. The bottle says this is a type II water resistant glue and not for structural use below grade. The Dacron was painted with an oil based paint to help preserve the glue bond. Perhaps TiteBond III would have been better. Time will tell.
Years ago sailing canoes and kayaks were built by covering a wooden frame with canvas. The canvas was sealed with oil based paint. This is a similar method, although the fabric is lighter, tougher, more inherently water resistant than cotton canvas. Some additional advantages are that when the Dacron is applied to the surface of the hull, it adds a degree of water proofing, strength and it also covers blemishes in the wood quickly and beautifully.
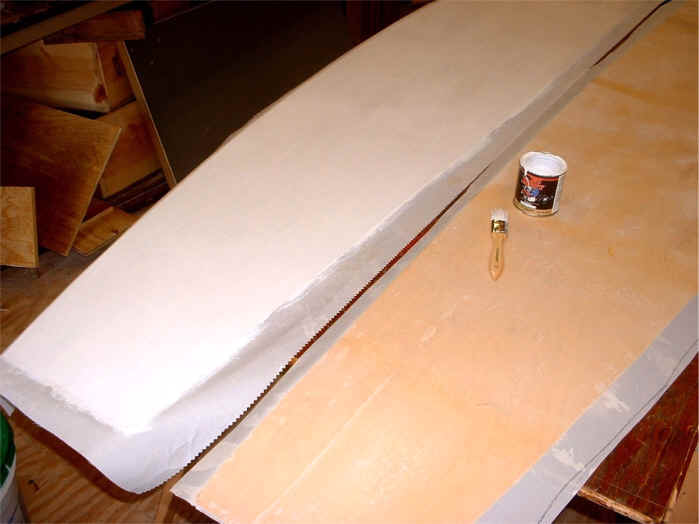
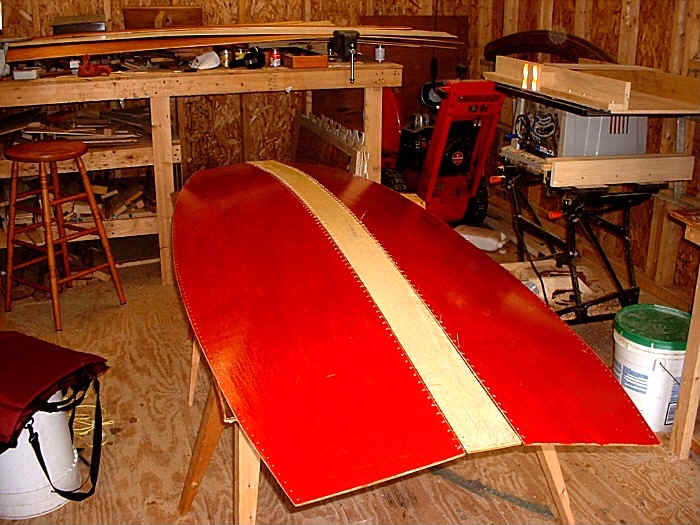
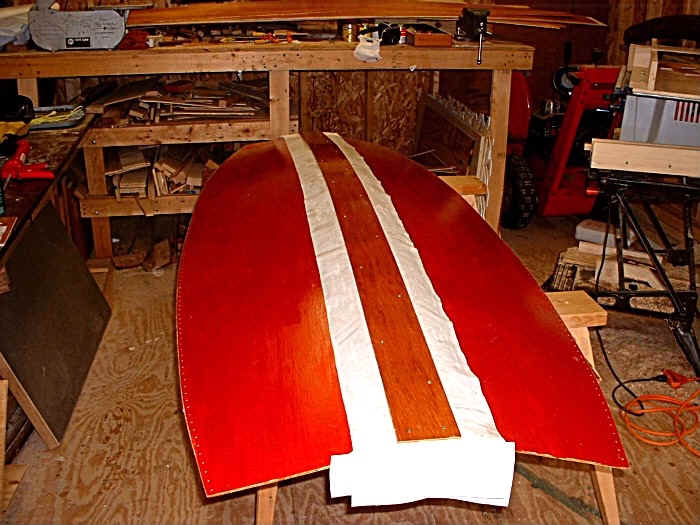
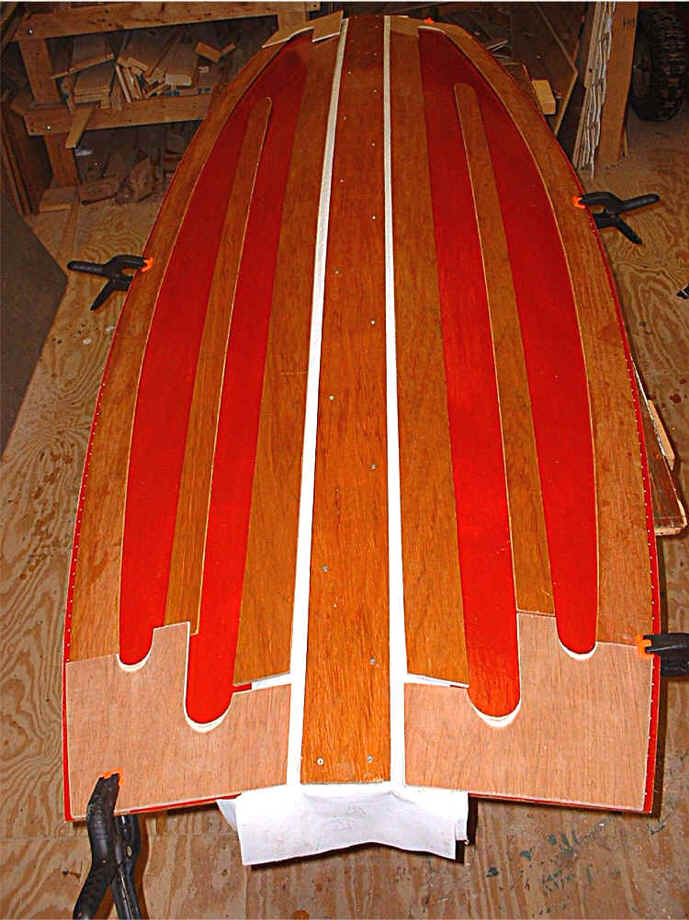
I painted the hull sides white and the hull bottom red. After the paint was dry I cut off the excess fabric with a knife. In this picture you can see pieces of the bottom of the hull before assembly. When the Dacron is painted it results in a very slick surface.
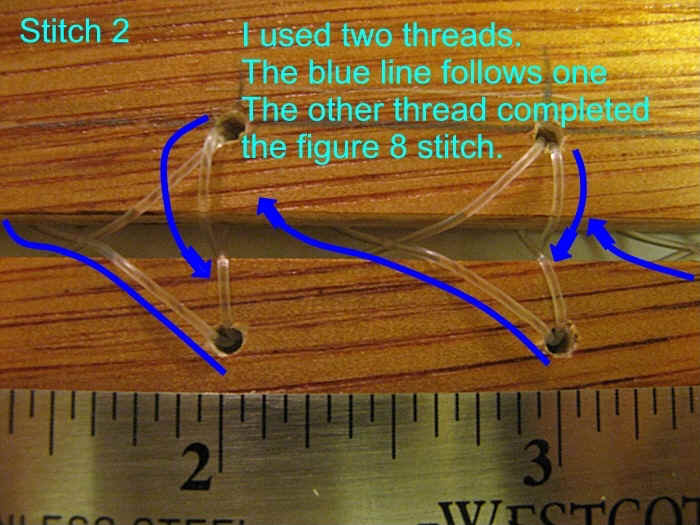
While I was working on this, I also built a proto-type model out of the luan material to test the hinge design I decided to try. The plans called for several metal hinges. After emailing the plan designer, I learned that Bill was experimenting with a threaded hinge using fly casting fishing line. I decided to try monofilament. The test piece I built looked like this. I used 50# test monofilament line to form a figure-eight stitch to join all the pieces of the hull.
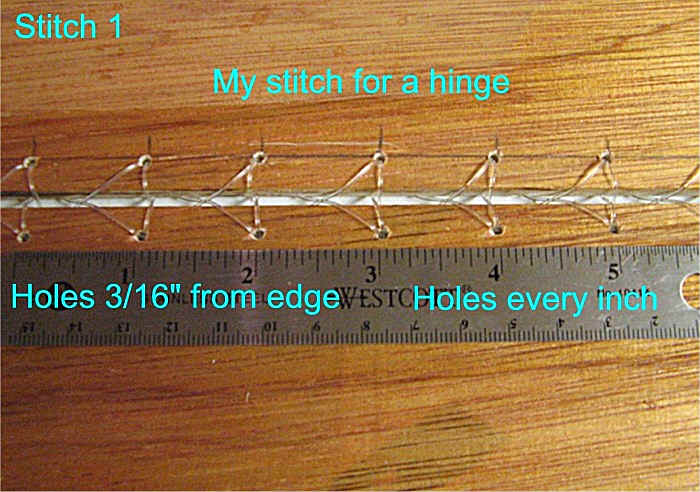
It may seem strange to sew the pieces of a boat together. However, long before metal was used to build boats, people sewed them together. The Inuit sea kayak was sewn, birch bark canoes were sewn, some Irish fishing boats were sewn, parts of the open ocean boats of the Polynesians were sewn and lashed, and I believe boats in Scandinavia were sewn. http://www.foteviken.se/sewnboat/boat/ Epoxy and fiberglass are versatile proven materials. But there are other ways to build a boat. I like trying this alternative way. Believe it or not, the figure-eight stitch provides a strong, flexible connection between two edges on a curving axis, like a hull.
The weave of the mono lines allow the two pieces of the hull to roll over the lines as the wood rotates almost 360 degrees on the hinge axis. The line is not pinched, folded or creased. It is pretty amazing.
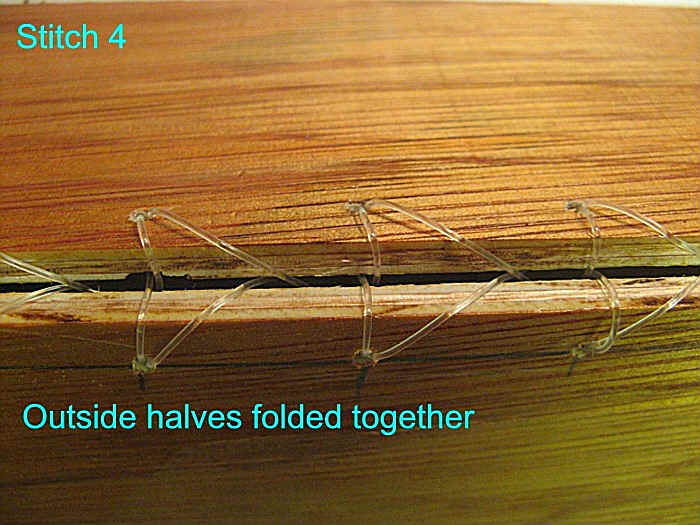
Drops of epoxy anchor the line in the holes at the beginning and periodically along the edges. Since I used two threads, if one line breaks the hinge is still held by the weave of the other line. This combination of many woven flexible threads is the same engineering principle that allows woven cables to lift elevators and to hold up suspension bridges.
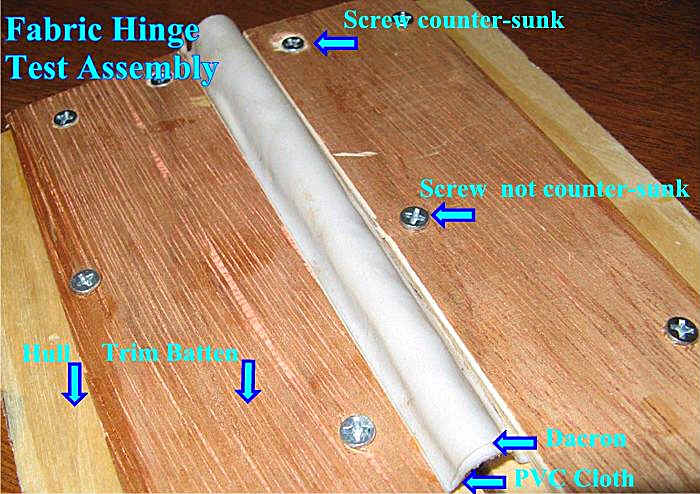
The purpose of the PVC fabric is to keep the water out, not to function as the load bearing hinge. The trim battens, siliconized acrylic latex caulk and screws all work together to seal and hold the PVC cloth in place.
After building the proto-type, I tried to tear it apart. I couldn't. I gave to my neighbor, a State Champion Super Heavyweight Power Lifter, and asked him to tear the test hinge apart. He couldn't. It was not a scientific test for durability, but it was enough for me to have the confidence in the mono line to start connecting the hull pieces.
I used a portable drill to make all the holes I needed for the hinge. There are a lot of them.
I finally started "sewing" the boat together. First I stitched one side of the hull to the keel plate. When it was time to stitch the other side of the hull to the keel plate I rigged a support line from the roof of the garage. I attached the edges of the hull to these lines with several loops of 50# test line. I put a temporary stitch in the bow, the middle, and the stern to form the shape of the hull. Then I stitched the hinge.
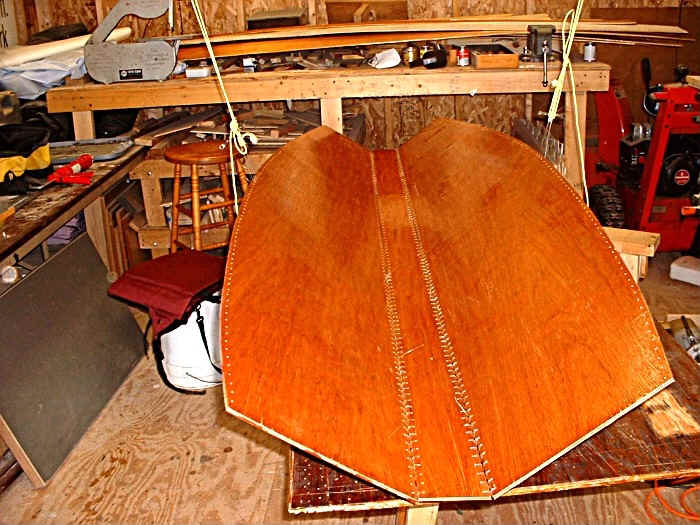
Here is a view of the hull bottom, showing the natural curve of the lines. It is starting to look like a boat!
Even when I flipped the hull over, it kept its shape.
I placed blocks under the hull to support the keel. Next I applied siliconized acrylic latex caulk to the keel plate. This product is rated for 35 years and is supposed to remain flexible and waterproof. It can be painted, too. It sounds good, but time will tell. The next step I took was to press the PVC cloth onto the caulk. I applied another thin layer of caulk, covering the top of the PVC cloth.
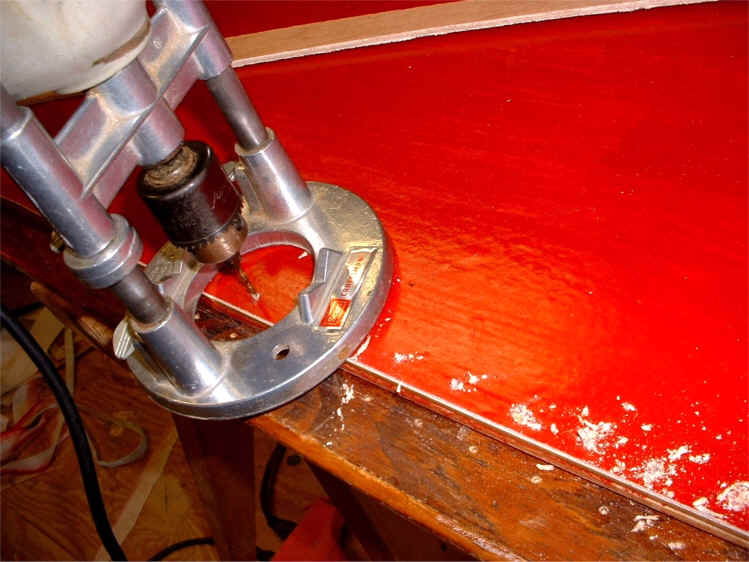
Before I attached the keel plate, I measured the placement of each screw and drilled a counter-sink hole for each screw head. I aligned the outer keel plate and attached it with screws. The screws don't go through the hull, they just bite the inner hull plate. The layers of latex and the PVC cloth form the water barrier. The screw heads are covered with two coats of exterior spar polyurethane. This construction method would not last for a boat that was kept in the water. But this is a folding boat and it will spend more time inside under shelter than in the water.
While the caulk was drying, I made the end pieces for the hull bottom. Here is how it looked when the pieces were assembled for a dry test fit.
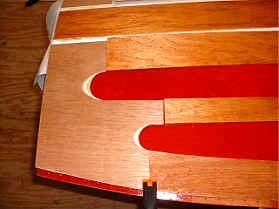

This is the bottom at the stern . . . and the piece for the bottom at the bow .
This shows how the hull bottom will look. These end pieces are needed to batten the fabric end of the boat. According to the plans, the hull pieces of the boat are designed as component pieces that can be replaced / repaired individually as needed.
These two pictures show dry fitting of the two end pieces of the port side of the hull. Bow is on the left, stern right.
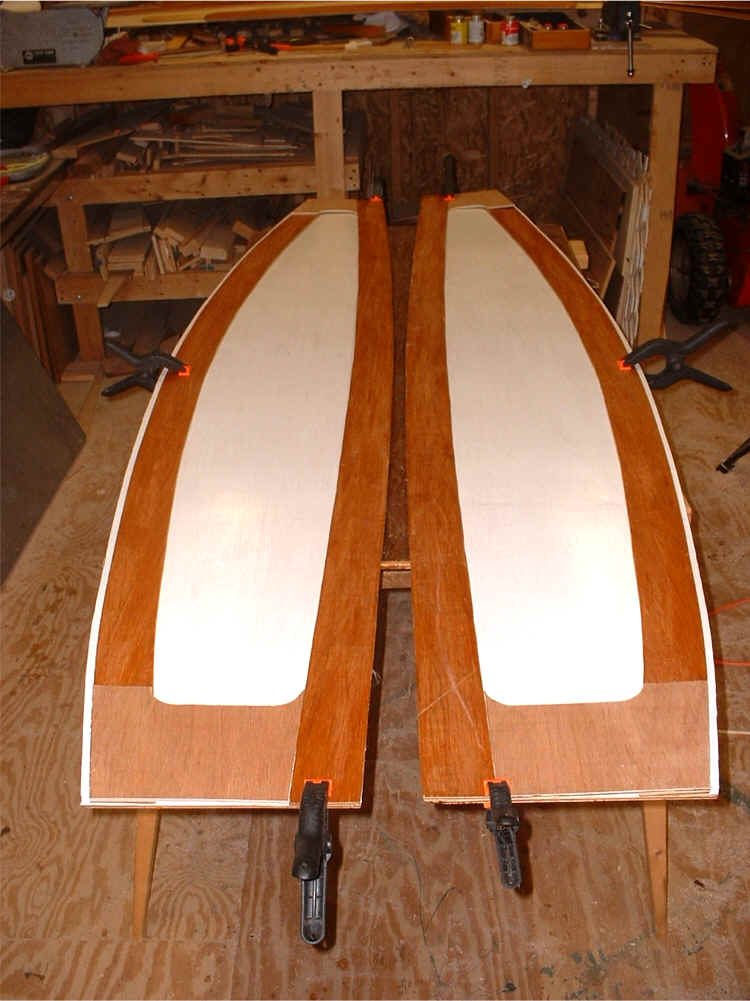
This view shows the port and starboard sides of the hull .
There is a novelty in building a boat this way. It is not the easiest or quickest way to build a boat. The tasks that take the longest time are stitching the hinge and brushing on the several coats of spar urethane.
Assemble the Barquito Gallery of Pictures
1 Basic Boating String Theory 2 Sewing the Hull 3 Keeping the Water Out
4 Center Thwart 5 Bow 6 Foredeck 7 Transom 8 Oarlocks / Oars 9 Skeg
10 Conversion to Sail 11 Leeboard 12 Rudder 13 Mast and Spars 14 Sail and Rig
Other Folding Boats On line Sailing School Boat Building Links
My Ashiko Handmade Rhythm Drum

![]()
| ||||||||||
