Home
Design
Mockup
Improvements
Drawings
Bugout Trailer
Cost
Final
Chassis
Skinning
AC
Roofing
Cabinets
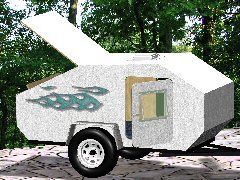
Building the Weekender mockup
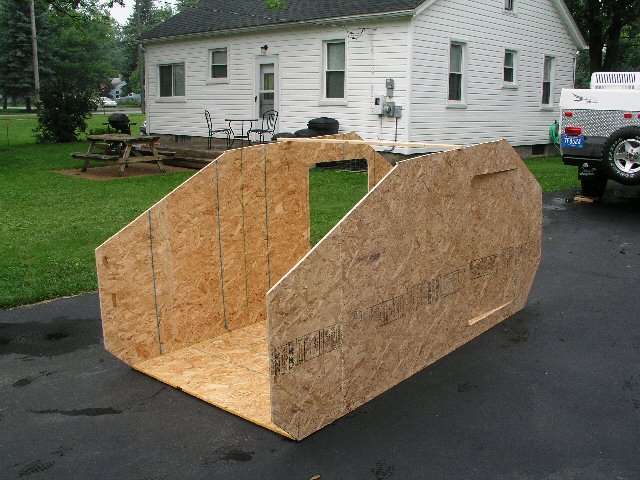
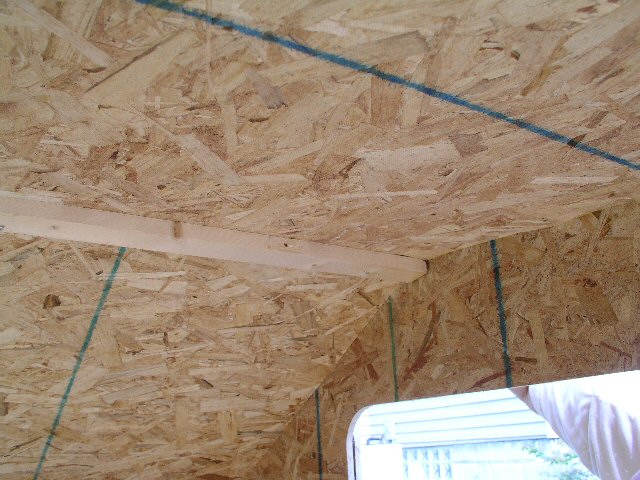
I had a bunch of ½" OSB scraps in the shed that were just begging to be built into something. This mockup would be the perfect use for them. Getting prepared. To build the weekender called for 2 sheets of 4x10 plywood. And there is no 4x10 OSB at our Home Depot, so getting prepared meant gluing up some OSB to make a 4x10 sheet. We used a biscuit jointer and put about 5 biscuits in the 4' edge of each piece of OSB. Then we edge glued the 2x4' extension to the main piece with gorilla glue. That took all of 5 minutes on Thursday evening. Friday evening we glued up the other side. So here's what our 4x10 pieces looked like before we started cutting them up.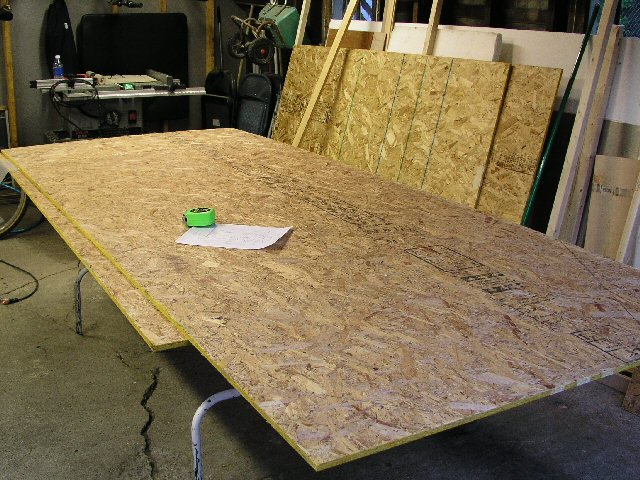
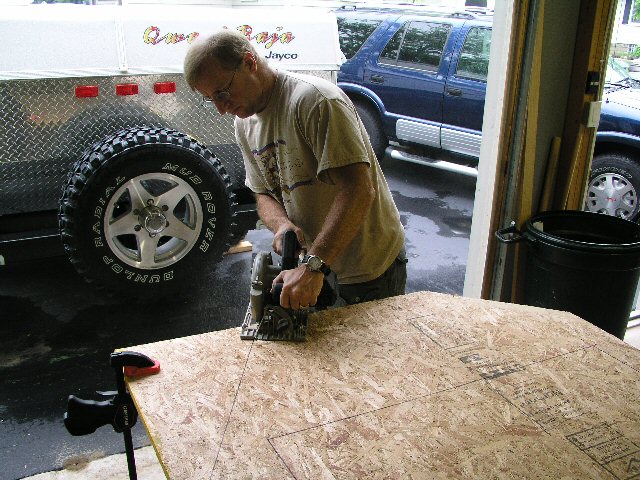
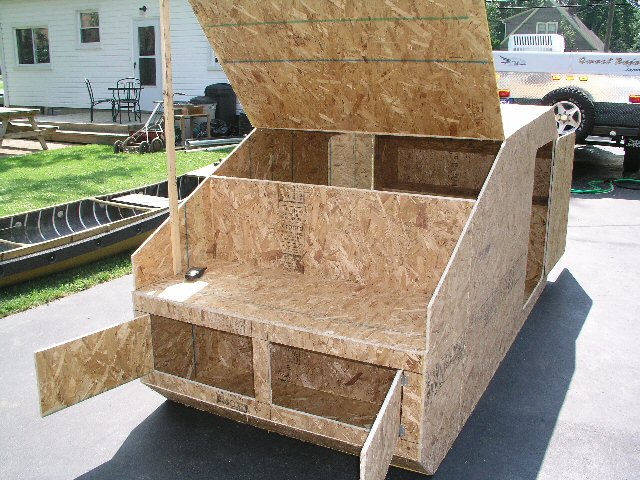
Saturday morning With the plans in hand we went out and cut the profile out of the 4x10 pieces.
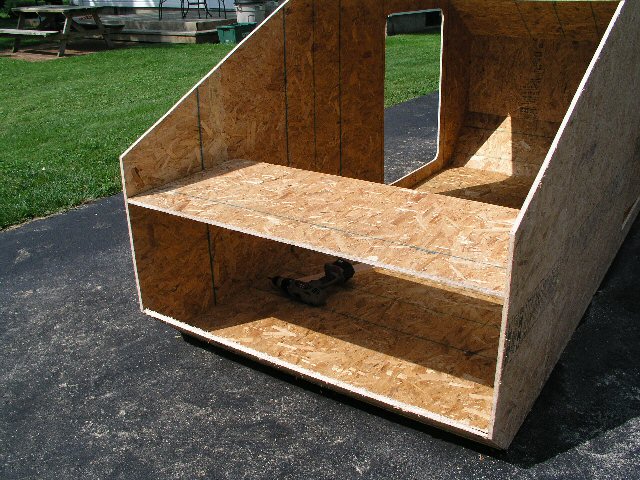
We attached the sides to a 4x8 sheet which represents the floor
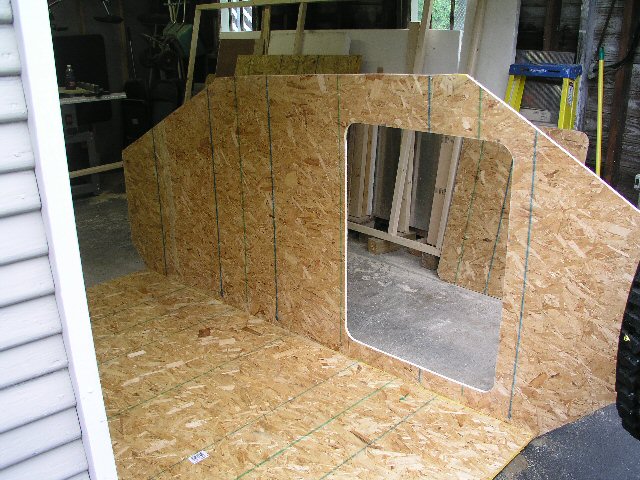
And we attached the other side...
Then starting with the front, we cut each piece to the right length, and with the right angle, and screwed it in between the two sides.
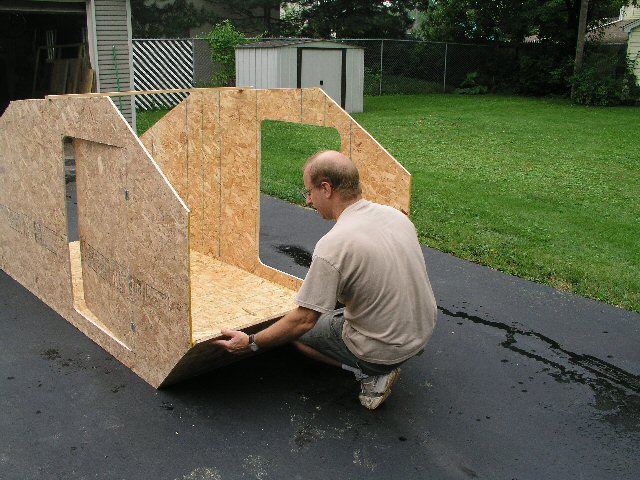
We attached the top to stabilize the sides...
Then we came back and put on the the front angled piece...
Inside we needed a 1x2 to put the screws into. There just wasn't any other way on this joint.
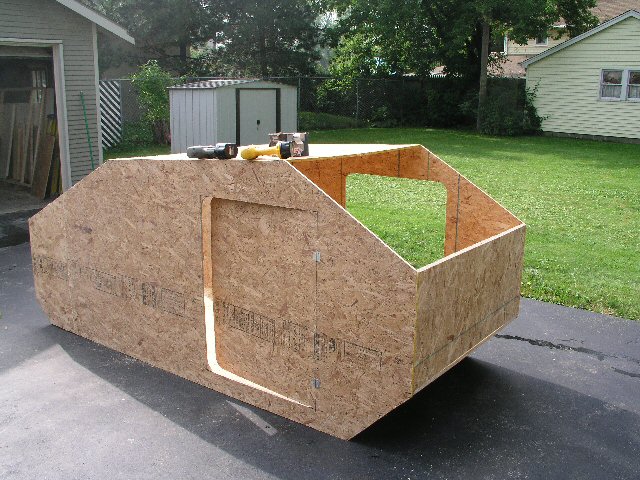
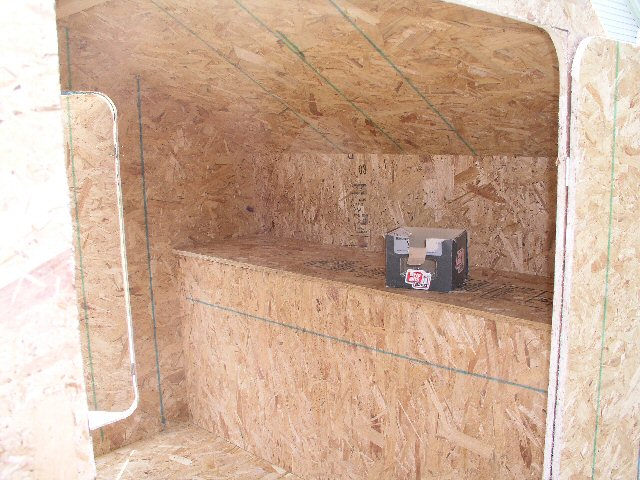
Finally we started in the back. First we attached the lower piece. Then we put in the counter...
Here we attached the vertical back piece...
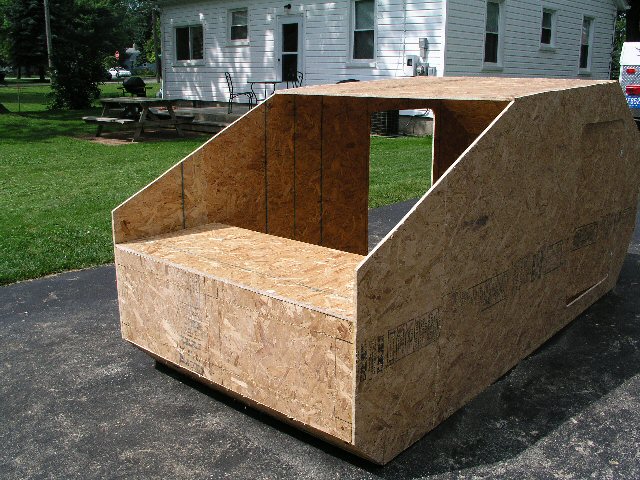
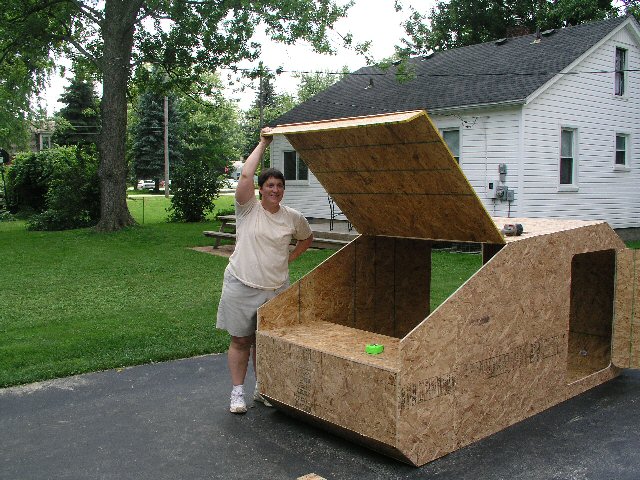
Then we added the hatch. Nothing dreaded about it. We just cut a piece of wood to the right size and we were done!
The original plan called for the rear vertical piece to go up several inches past the counter, up all the way to the hatch. But after looking at the mockup, it didn't look right. So we stopped the rear vertical piece at the counter, and planned on adding those last few inches to the hatch. So far the hatch was not too complicated, or too difficult to built. And we could always add a couple gussets if needed for strength. Yes, that looked perfect!
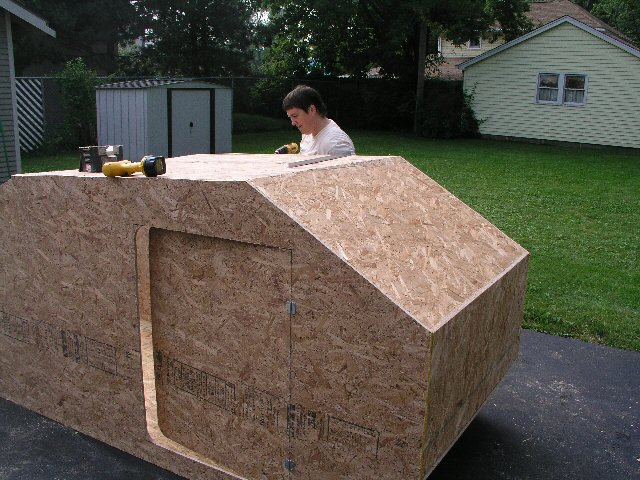
Then we went inside the teardrop and screwed in a rear bulkhead, a counter, a shelf and a front chest wall.

The whole mockup project had not taken long at all. Several hours up to this point. Then we stood back and said, what's wrong with this? The first thing we addressed was access to the rear storage. The hinged counter was not going to cut it. So we put a couple doors in the tail end. These doors can be trimmed out with T molding and weather stripping. Ah, perfect. Easy access to the rear storage.
We also figured that the tail lights and license plate would be mounted to the frame or the fenders.
Inside we looked at the area where the front storage would be. This would be perfect for pillows and blankets. So instead of cutting out holes to mimic doors, we put on a hinged lid. Voila, a built in blanket chest! So far I am liking this!
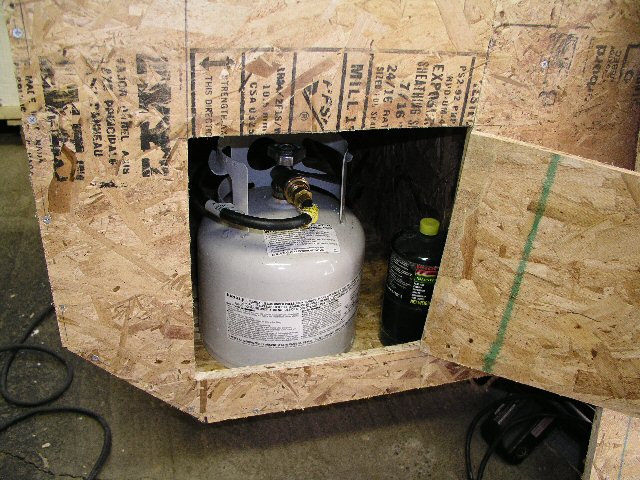
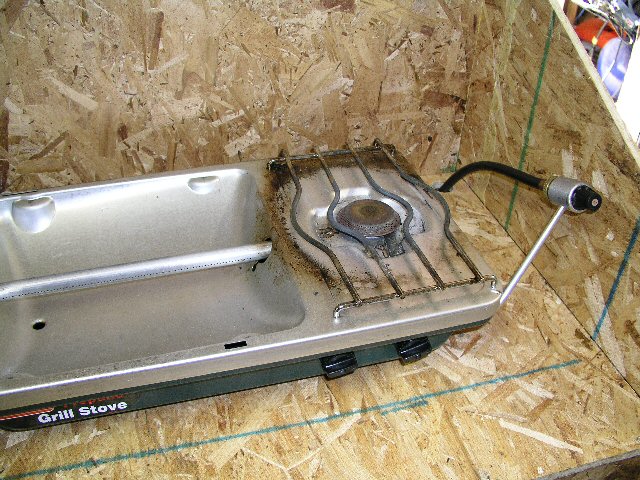
The next morning we went outside and eyeballed the mockup some more. Hey, lets put in a dropped stove, and hide the propane under the counter. So we cut an access door on the side, which in practice will be a vented door. We put a hole in the counter, and ran our hose from the stove to the propane bottle. Great! We'll need a dividing wall under the counter to seal off the propane from the rest of the storage area. Then we'll put a hole in the floor, about 2" in diameter or so, to help encourage any propane to vent out the door. So far it's looking pretty good.
The extreme cooler will be in the car, or on the ground. No need to waste any space in the galley with the cooler. The inside of the Weekender is for sleeping only. Because it's an oddball size, the best option is to get a custom sized foam mattress from Knox Foam. Michelle wanted more than just sleeping in the Weekender, she also wanted to be able to sit at a table. After reviewing some of the options, it was decided that we would not build a raised platform to sit on. Building a raised platform would take away from valuable headroom. So then we thought about putting in a dropped floor. This could work, if we could find a wall to mount the table to. Then I remember Michelle hurt her back lifting the table in the Baja Benroy. So lifting a table was out of the question. A hinged table might be a better solution. We could mount a hinged table to the door, but it would be mighty small. The solution was to turn the table and floor assembly 90 degrees, and mount the table to the cabinet. It could be either a slide out table, with part of the table sliding in under the galley counter, or it could be hinged to the lower edge of the cabinet. We opted for hinging it. Then we looked at the dropped floor again. We decided that instead of a dropped floor, which adds to the complexity of the frame and the body floor, we could just add a couple hinged benches to the wall. We would still have to come up with some kind of a flip out leg for support, but we were confident that would not be a problem.
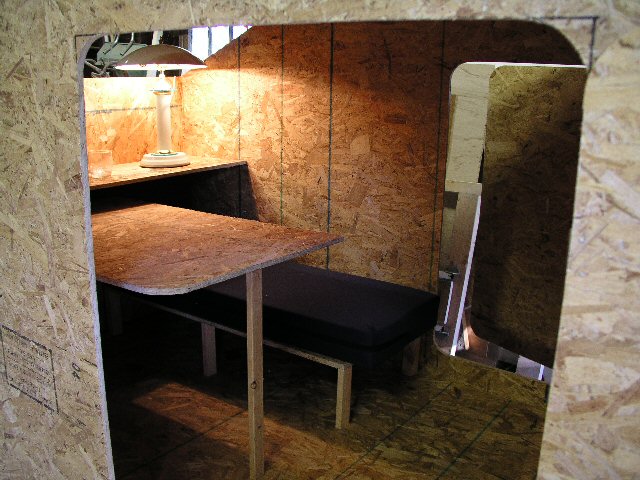
For this table arrangement to work, the teardrop would have to be at least 5' wide. 17" for each bench and 24" for the table. So now Michelle gets her table and her queen sized mattress. A queen sized mattress is 60"x80" but we'll allow 1" for each wall, and make the mattress 58" wide.
We now have two distinct plans. 1) A basic 4x8 plan with a body that can be built in a weekend, and a ¾ full bed inside 2) A 5x8 plan with split cushions, that can be stored on the lid of the blanket chest, and flip down table and benches
Back in the 50's rocket designers were told to come up with designs that were better, faster and cheaper. The reply back was always, "Pick 2". Now as we think about the Weekender, we were hoping to come up with a design that was faster, cheaper and lighter. And we realized that we could not have all 3. We realized that many people thinking about the weekender want "faster", so that they can get out camping, faster. So faster will remain the primary focus of this web page.
We on the other hand needed something lighter. Light enough to be pulled by the Jetta. Building lighter meant building a frame and skinning it with ¼" luan. Many of the benefits of building with plywood were lost. I knew it would take me a weekend just to build 1 side. But ¼" luan was cheap, and light, so we got 2 out of 3. Not bad!!! It's time to make a decision on what the primary focus of the Weekender, and this page would be. And the primary focus will be speed. Get it built FAST! So while we will use photos of our light weight Weekender to show you our progress, the discussion, and plans will be for a 4x8 FAST Plywood Weekender.
All Contents Copyright 2004 by Mike Schneider
This document maintained by
mykes@comcast.net.