© 2004, 2005, 2006, 2007 by Man of the Cloth Productions
Although it may seem out of step, I actually started the construction of this entire project by making the template pictured below. It was made out of pressed hardboard and a few scraps. First, I transferred the shape of the outside profile from my CAD drawing to the template. Then I cut the hardboard to the actual size of my design. I used the mock-up of the profile to check the amount of room inside the cabin and to check the placement of the framing members in the walls.
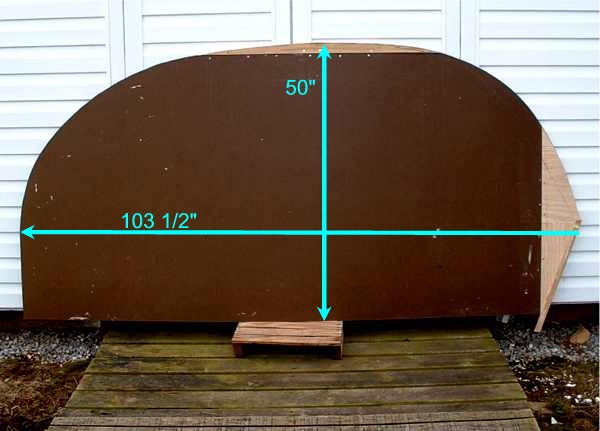
I laid out the 1x 4" framing members on this template to determine best location. I also marked the top edge of the framing pieces by tracing the curve off the template. This process seemed easier for me. The alternative was to make many exacting measurements. This approach went so quickly that I forgot to take a picture of what the frame looked like when it was laid out on the template.
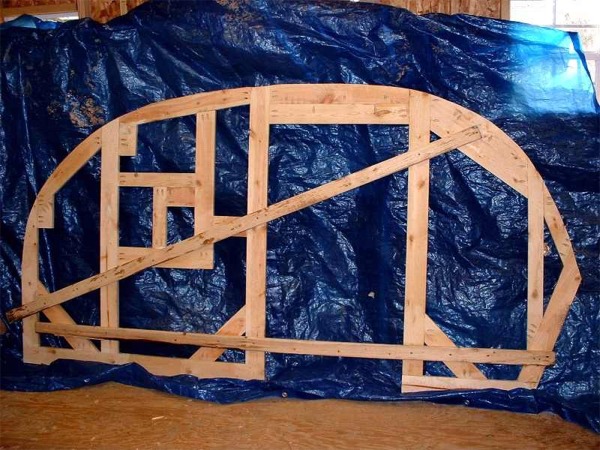
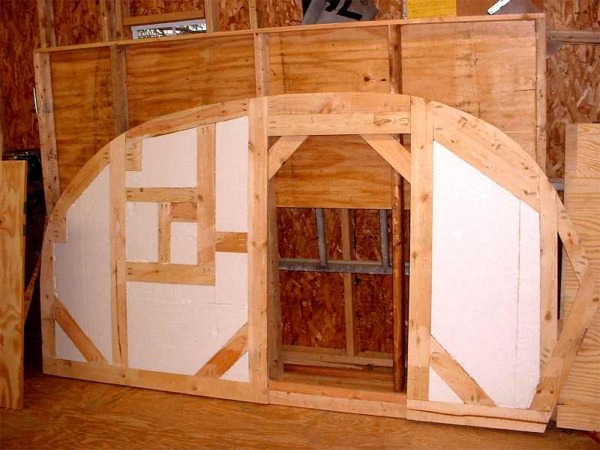
Here is the first frame completed. You can see I reinforced where I thought it would need it. Two braces hold the frame so I could move it until the first skin was installed.
In my design, the front has a point. I think this will be the signature look of my design. The practical result will be evident when the time comes to skin the cabin ceiling and the exterior roof.
I expect the arc of this curve to place less stress on the skins, compared to a curve that goes all the way to the front edge of the deck. In the above picture, the galley will be to the left. The framing in the middle will support the bulkhead. Most joints are butt joints that are held together with screws and waterproof Titebond III glue.
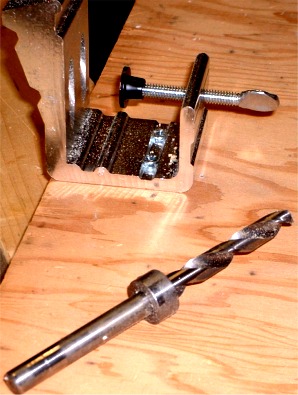
I used a pocket jig to countersink holes for the screws. I purchased this at Home Depot. It was worth the cost. I couldn't have built the frames or the hatch without the jig.
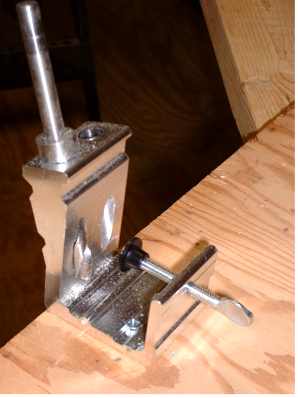
I used a lap joint to join a band board at the bottom to the vertical support frames. These lap joints carried the lateral stress of the entire upper cabin to the framing of the deck.
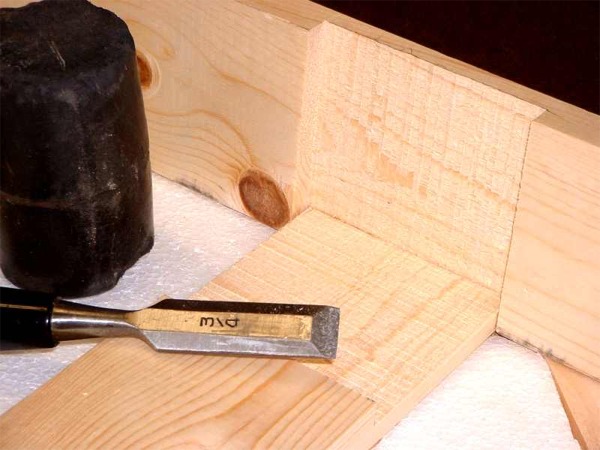
I used the table saw to rough cut most of the material away, and a hand chisel to clean up the pieces. Getting the table saw cut right was the trick for a tight joint. I glued and then clamped the joint for 24 hours.
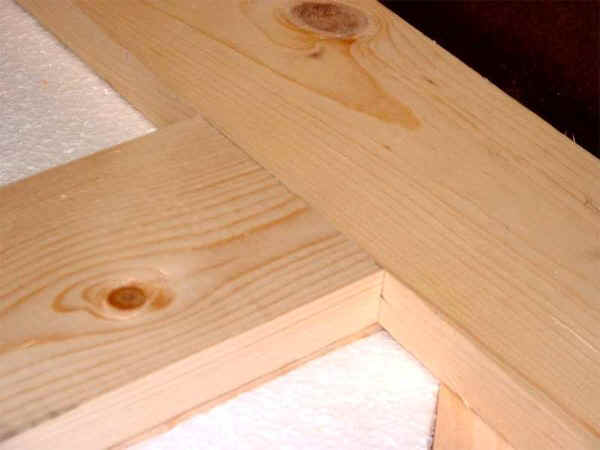
There is nothing like a joint that comes together just right. Sweet!
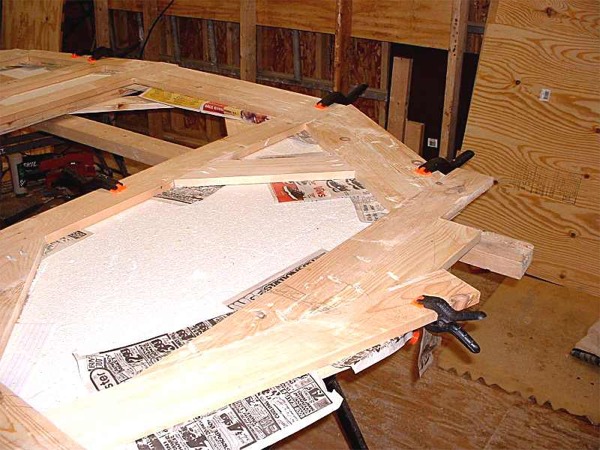
The next photo shows how I laid out the frame pieces around the front curve. I just "eyeballed" where the wood would have to go. I trimmed the frame with the jig saw to match the curved line I traced from the template. Every butt joint was pre-drilled with the pocket jig, which made angled pockets for the screws. The butt joints were glued on the common surface where one board touched another. Then the frame was clamped to the template to dry. I placed paper between the frame and the template so the glue wouldn't bond these together. The picture below shows the second frame built on the pattern of the first frame. That is why you see the insulation of the first frame.
After the frame was built I marked the edge of the outer plywood skin for the wall. The braces were extremely handy for moving the frame around at this time. When the plywood was true to the back and bottom of the frame, I traced the curved line of the frame onto the plywood skin. I also traced the outline of the door. My next step was to cut out the plywood with the jig saw to match the curve of the frame and to cut out the door opening. In some places there was a little extra material. I cut this off later with the router.
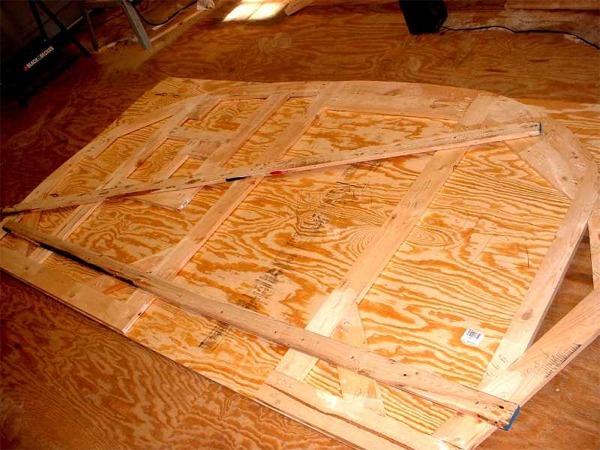
After the plywood skin was cut, I glued and screwed the skin to the frame. The photo that follows shows how many clamps I used for this. I could have used more.
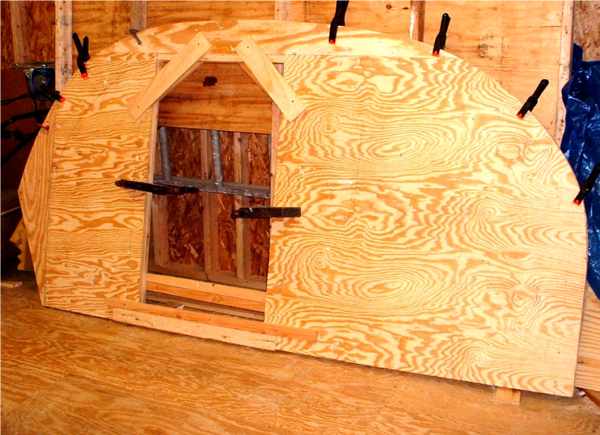
Then I cut and placed 3/4 " rigid styrofoam insulation between the frame members. That was how I made each of the walls.
Please visit this sponsor
 .
.