© 2004, 2005, 2006, 2007 by Man of the Cloth Productions
The deck for the Zephyr was a 2x4 frame covered with 1/2" plywood. I arranged five 2x4 cross members so they rested on the steel cross members of the trailer. I used a router to counter sink a space for the trailer’s bolt heads.
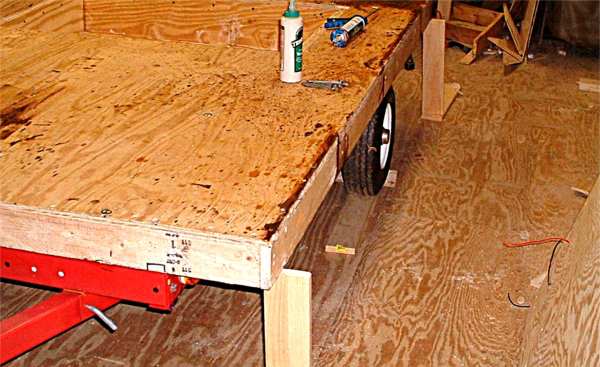
I attached a band board made out of a 1x4 to the side of the deck frame. The photo below shows the band board on the right side of the deck, the front 2 x 4 and a few of the props I used to keep the trailer stable as I worked on it.
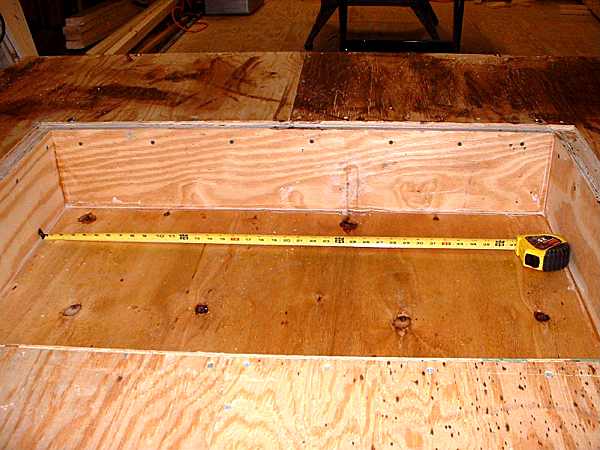
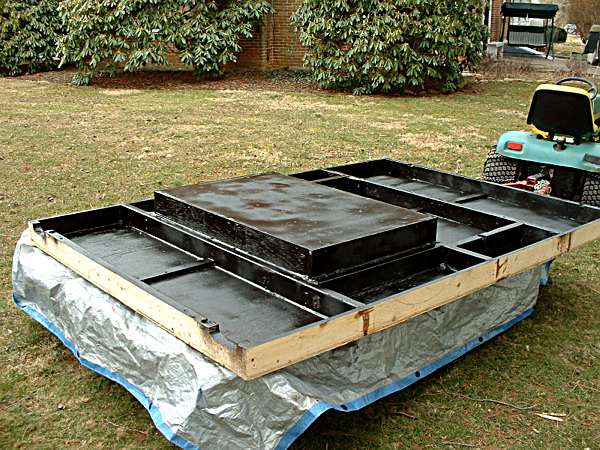
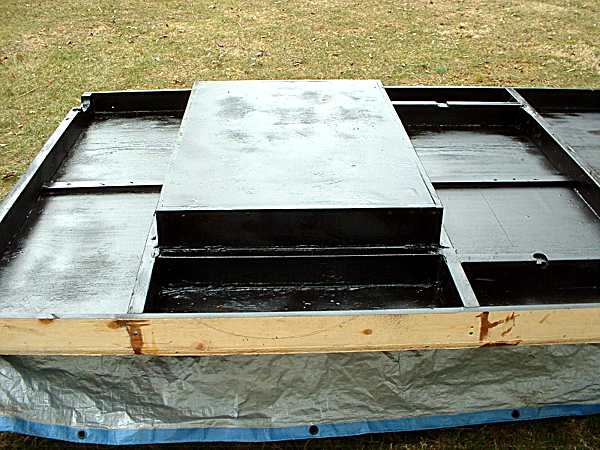
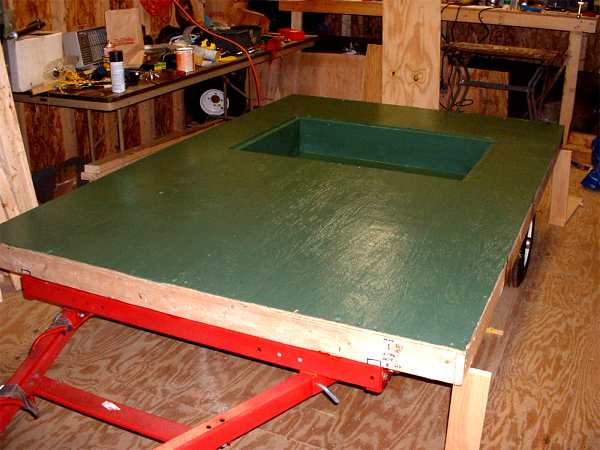
I cut out a section from the middle of the deck to serve as a storage trunk under the bed. I located this over the axel, between the frame of the suspension carriage, and against one of the steel cross members. I measured three times before I cut to be sure the motion of the suspension would clear the sides of the plywood well.
I used ¾" plywood for the sides and the bottom. Lots of screws and waterproof glue hold it together. I may decide later to reinforce the bottom of the well with angle iron attached on the outside.
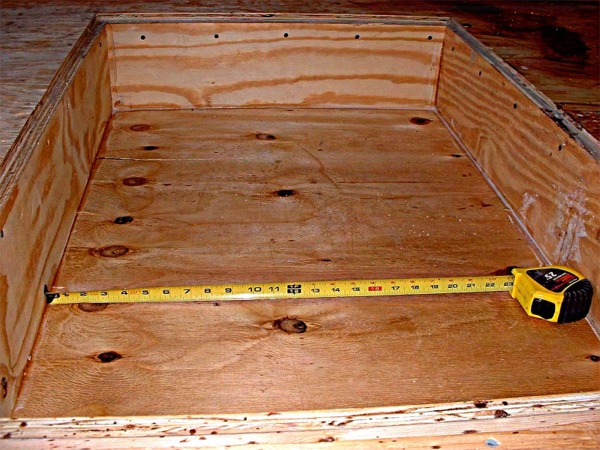
As constructed, the space in the storage well was 3 three feet wide by two feet by 7 inches deep.
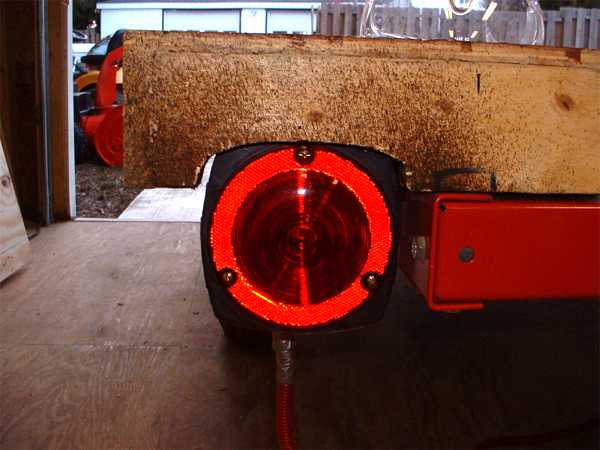
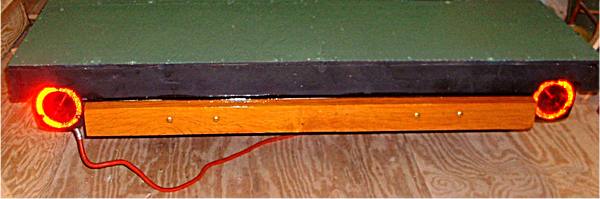
The photo shows how the deck extended over the brake light. I cut away some the 2x4 to allow for greater visibility of the brake light.

Later on, I painted this 2x4 at the back of the deck black to visually blend the frame and the light assembly.
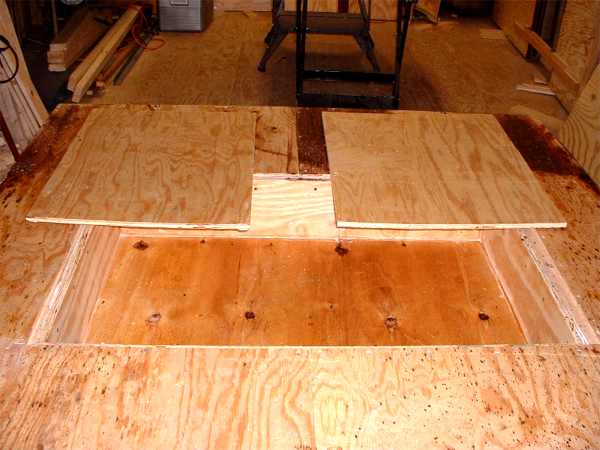
I saved the pieces I cut out of the deck to use them as simple lids for the storage trunk.
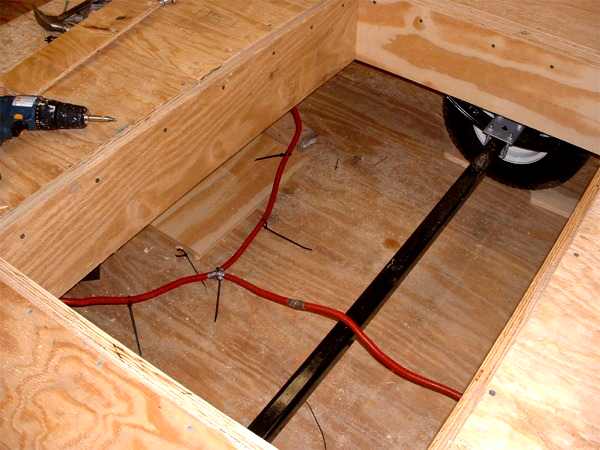
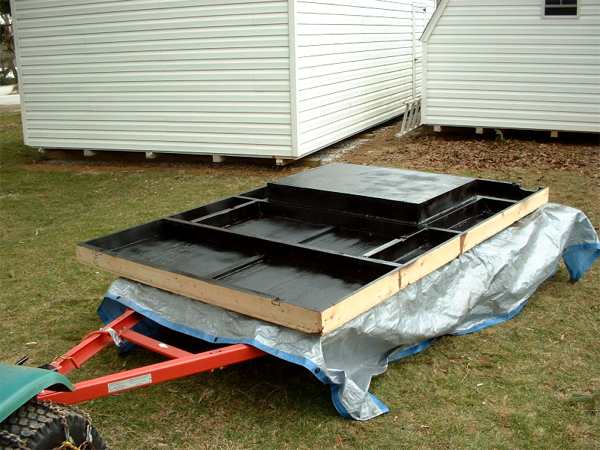
Instead of using roofing tar to undercoat the deck, I purchased spray automotive undercoating. I used five spray cans to cover the deck. The next photo shows the framing of the underside of the deck structure.
I was pleased with the way the spray undercoating went on. It entered cracks, covered knotholes, and could be sprayed more thickly as needed in a second coat.
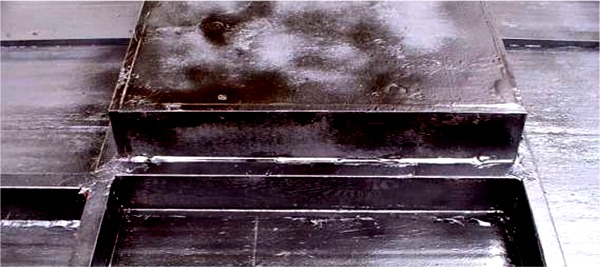
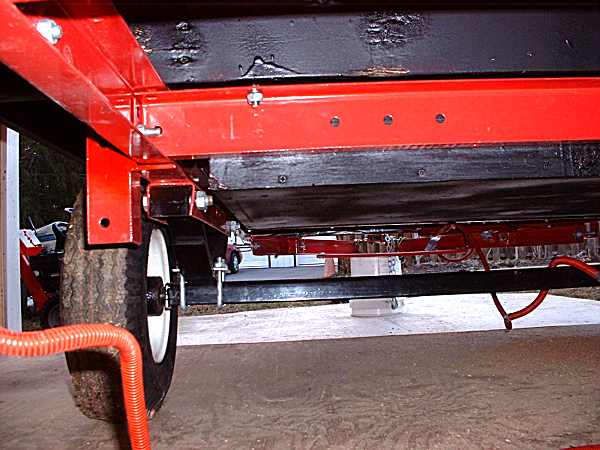
Here is a close up of the wheel well and the underside of the storage trunk. Later on I might install a curved piece of fiberglass-reinforced paneling (FRP) into this area to keep mud from accumulating in the area around the wheel.
This photo shows the deck in place on the trailer frame. I used eight stainless steel carriage bolts to hold the deck onto the trailer. Before I undercoated the deck, I predrilled the holes for these bolts. You can see one coming through the cross member in the photo at left. Each carriage bolt was secured with both a lock washer and a nut with a nylon-locking insert.
You can see how close the storage trunk was to the suspension carriage. I maximized the width of the well, making sure it doesn't interfere with any movements of the axel or springs. The 2x4 framing under the deck allowed for such a deep well, while keeping good ground clearance under the storage trunk box.
Just to dress it up, I painted the deck a forest green. I realized I would have to touch it up if I dripped stain on it when I finished the inside cabin ceiling.
Although not required in PA, I thought a wooden bumper would be nice on the back of the Zephyr. I cut the bumper from a piece of quarter-sawn aged oak that was given to me. The original size was 4x7". I cut it down to match the steel cross member at the very back of the trailer. Four carriage bolts hold the bumper to the steel frame. The gift of the oak is another example of how this project has become a magnet of interest, tools and even materials from other people.
.Please visit this sponsor