© 2004, 2005, 2006, 2007 by Man of the Cloth Productions
Once the bulkhead was framed, insulated and skinned on the cabin side, I completed all the electrical work. After the wires for each planned circuit were in place, I turned my attention to the galley side of the bulkhead.
Throughout the process of building my trailer I found it very convenient to have the space at the bottom of the bulkhead open. Tools and materials were always within easy reach.
It was time to close this gap.
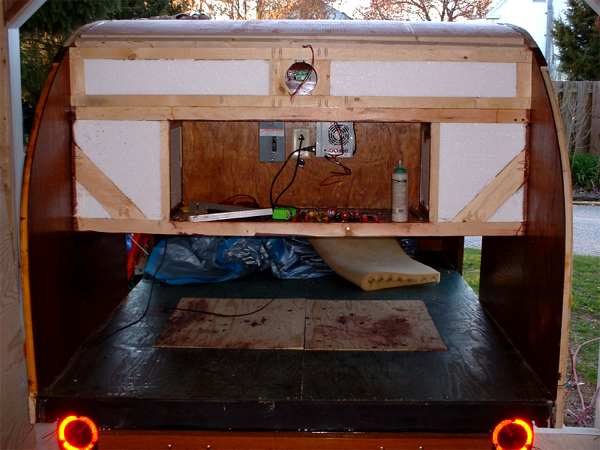
Earlier, I had built a wall frame to fit the opening. Now I skinned it to match the cabin on one side and the galley on the other. Salvaged window locks hold this frame in place. I placed two on the galley side and three on the cabin side. This arrangement will allow me to remove the panel if needed and to haul lumber up to a full 4 x 8’ sheet of plywood. Before I attached the upper galley wall I put a piece of window screen between the luan skin and the fan hole. This will keep the "skeeters" out of the cabin when the fan isn't turned on.
Next I cut and secured the final roof spar. I used a piece of oak to carry the load of the galley hatch. I drilled holes through the wall into the end of the spar. Then I fastened the spar with 3 1/4" lag screws. I made this hatch spar stronger than the others because the Zephyr is wider than most Teardrops and the hatch will be heavier than smaller ones.
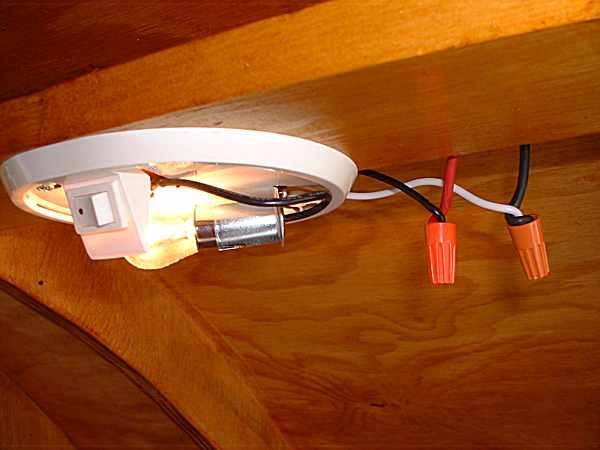
In the photo, two sets of wires come through the galley wall. One will power the overhead hatch light, the other will connect to the batteries.
Next I built the frame that would hold the hatch skin and the hatch hinge. I started this part of the project by making six plywood ribs that would match the shape of the side of the trailer. To do this I traced the shape of the curve at the back of the trailer onto a scrap I used as a rib template. Then I cut along this line. (In the picture the template is the luan underneath the rib.) I traced the curve from the template onto a sheet of 1" plywood. I used a 2" wide block of wood as a scribe to trace a new parallel line 2" from the first. This became the outline of the rib. I traced all six ribs onto the plywood sheet using this method.
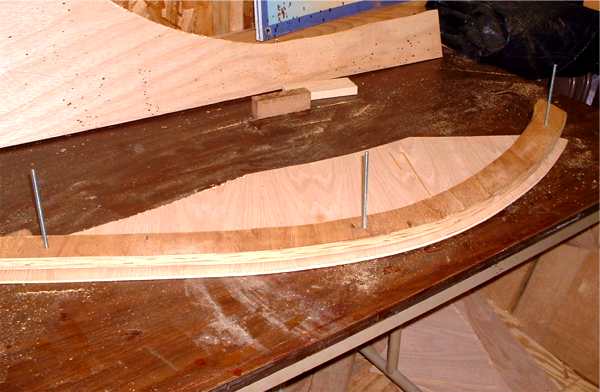
I carefully cut the ribs out of the sheet with a jig saw. The shape of these pieces were close but not exact enough. So I stacked them in such a way that the dimensions of the arc were as close to matching as possible. Then I drilled three pilot holes down through the stack. I inserted three long bolts to tie the ribs together. The bolts held them as one block of wood. (See the start of this in the picture above.)

I used the belt sander to sand out the imperfections in the arc of the block of ribs until they all matched the template. Then I removed the bolts so I could build the individual ribs into a frame.
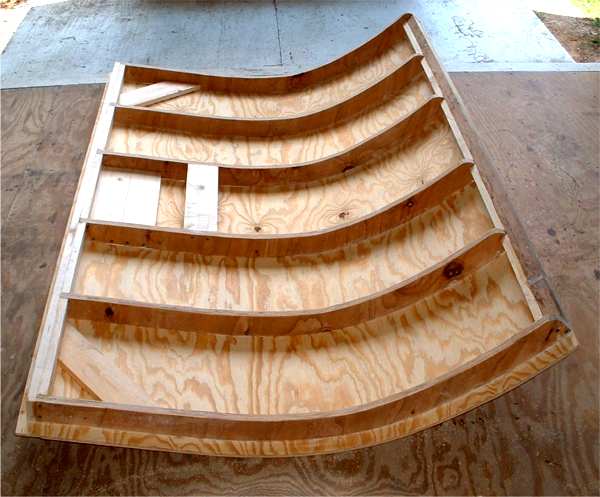
I used a piece of oak at the top of this frame and a piece of pine at the bottom. I placed the ribs vertically to prevent the skinned hatch from springing flat and losing some of its arc.

I came up with a method of fastening the ribs to the oak at the top and the pine at the bottom of the hatch frame, since there is little holding power in the end grain of plywood.

First, I cut a pine board to fit between each rib placement. Using the pocket jig I drilled guide holes in the ends of each piece. With this set up, I fastened screws into the side of each plywood rib end. Then I drilled screws down through the reinforcing board into the horizontal framing.
I used Titebond III waterproof glue on these surfaces before these pieces were screwed together. I also added corner reinforcements to the bottom of the hatch, and a wood plate to back the hatch handle. Before skinning, I placed the frame in position to check for fit. (See photo 2 above.)
The photo above shows what the hatch looked like after it was framed and skinned with 1/4" plywood. The top of the hatch is located on the right and the bottom is on the left. I started applying the skin at the bottom, allowing for 3/8" overlap. Using subfloor adhesive and screws, I attached the skin, working my way to the top of the hatch. When I finished, I trimmed the excess plywood flush with the oak frame at the top of the hatch with a router.
To weatherproof the hatch I applied the undercoat of the Snow Roof system. This is a liquid elastometric rubber roof that bonded well to wood. I applied several thin coats of the gray base.
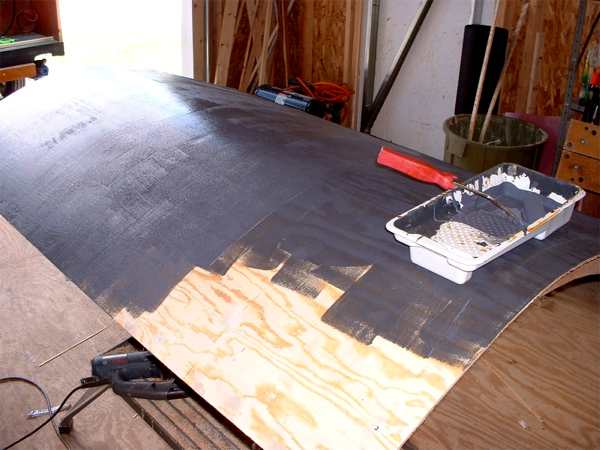
After several base coats, the hatch looked like this. I thought it looked like a wing.

While the hatch was drying I installed the hatch hinge. I split a bicycle inner tube, and drilled pilot holes for the pan head screws. Both the screws and hinge were made of stainless steel.
I placed the hatch on the trailer in the closed position. When it was in the optimum location I attached the hinge to the oak load-bearing piece of the frame. Here is what it looked like the first time I opened the hatch.
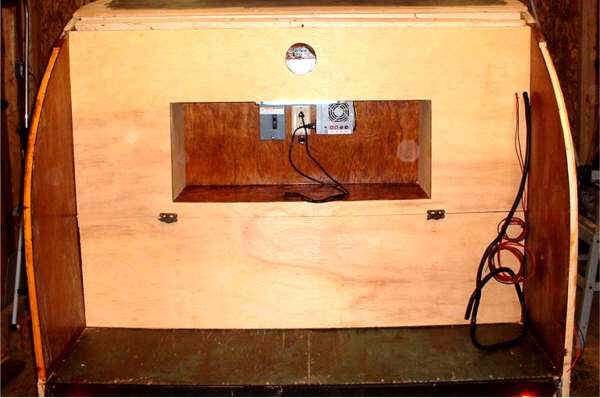
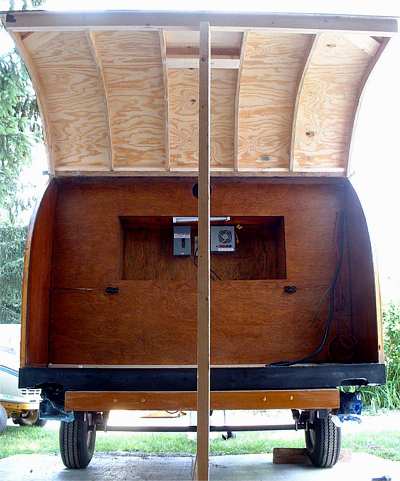
I finished preparing the outside walls by sealing the edges. I trimmed the door opening and covered the bottom edges of the walls with some salvaged vinyl trim.
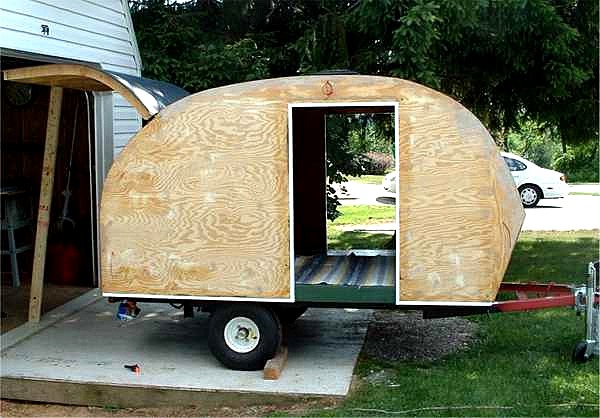
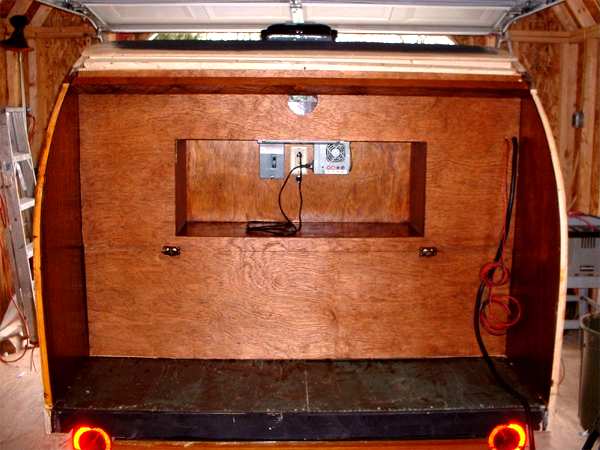
An inside view . . .
A day or two later, I stained the inside of the hatch and coated the roof with several layers of the Snow Roof top coat. I painted the camper sides with white epoxy paint.
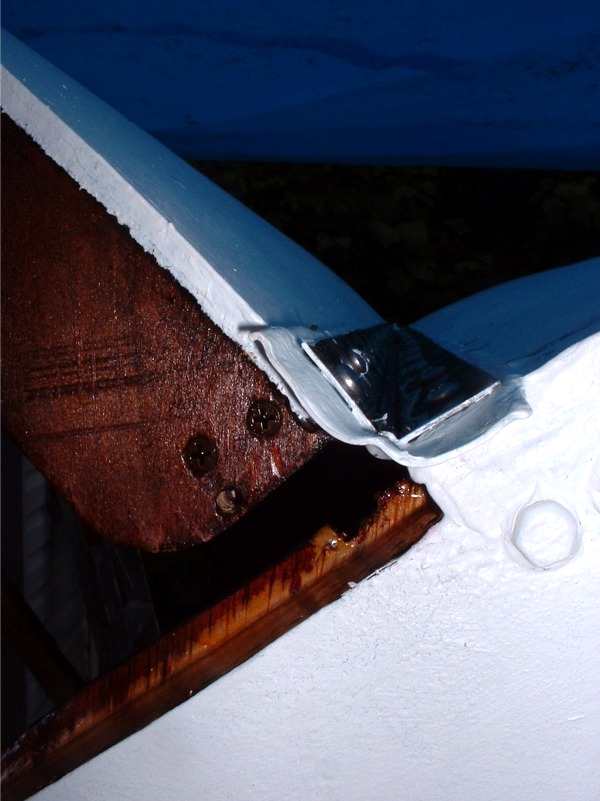
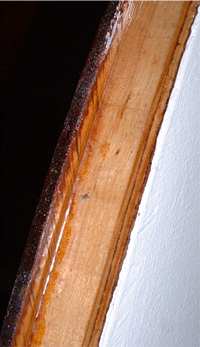
With the hatch attached, I started weather stripping the seal. The side walls at the back were built with a slight offset. The inside edge is slightly higher that the rest of the wall. Previously, I coated this area with two coats of fiberglass resin.
Once the resin was dry I applied a neoprene weather strip with a self-adhesive backing. This is the bottom of seal. Another weather stripping will go on the hatch itself.
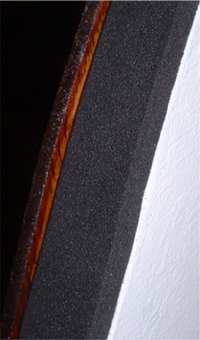
The pic below shows how the hatch looks when closed...
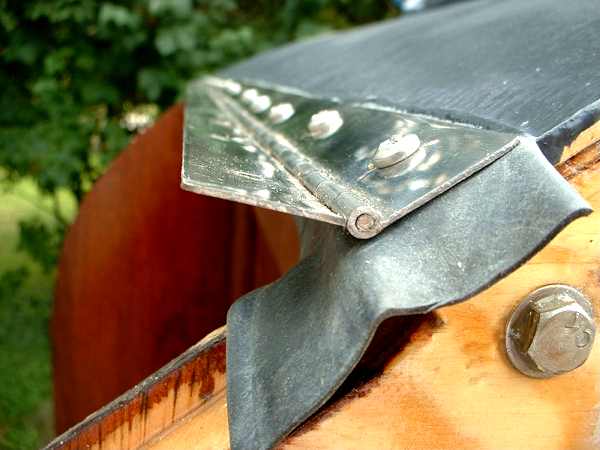
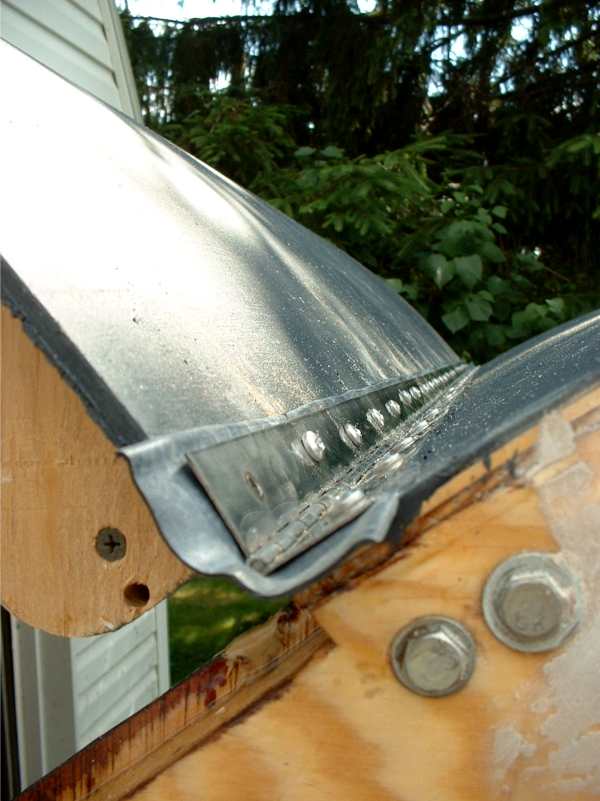
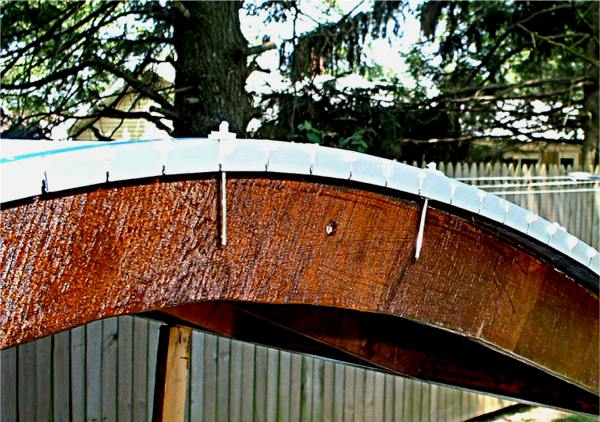
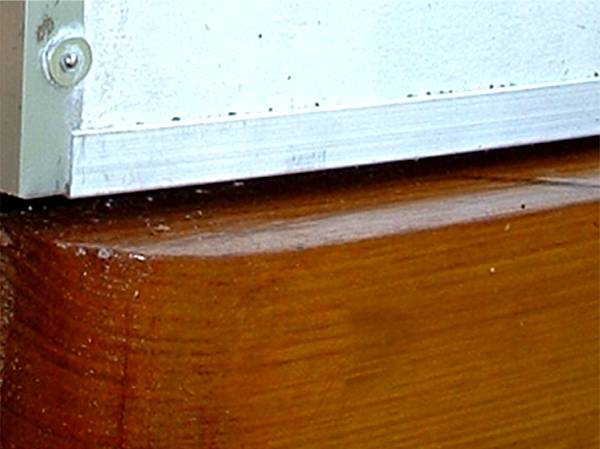
I trimmed the hatch edges with aluminum to give it a finished look and to protect the end grain of the plywood, which is most vulnerable to water damage. The bottom of the hatch was a piece of channel aluminum designed to be "friction fit" onto the edge of 1/4" plywood. With the layers of rubber roof it is very tight.

I used 3/8" L-shaped aluminum to trim the hatch side edges. Instead of annealing the aluminum so I could bend it, I cut a series of slots in the side.
I predrilled holes for pop rivets through the aluminum trim and through the hatch edge. Prior to installation, I applied a liberal amount of siliconized acrylic caulk.
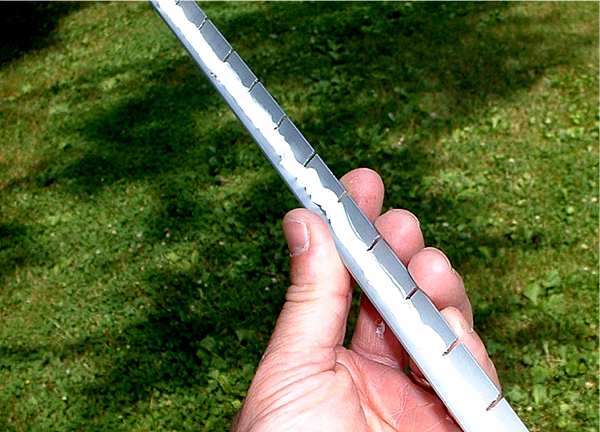
I placed a washer on the bottom flange of the pop rivet. Each rivet was then inserted from the bottom, through the wood, and finally through the trim. I placed an additional washer on the top of the rivet.
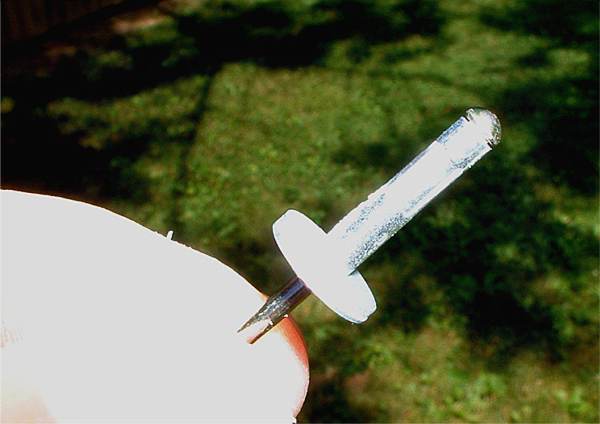
The picture below shows how the slots allowed the trim to be bent. It also shows the rivet stems. I snapped these off with a pop rivet gun. This arrangement placed the smoothest side of the rivet inside the hatch overhang, while the rivet "button" formed on the outside.
Here is a close up of the trim finish and a rivet button. The picture shows the excess caulk and other construction debris that I cleaned up later.
The photo below shows the overhead galley light in the hatch. I removed the cover of the DC light to determine which wire in the fixture hot and which was a ground. In my trailer wiring scheme red is positive and black is negative. The light was manufactured with the white as ground - and the black as the hot + wire. That's why I connected my red to black and my black to white. The light bulb would work either way. But this way the base plate is not energized. It doesn't hurt to have a safe electrical system.
When I was finished with building the hatch, this was what it looked like. (No the hinge wasn't crooked, it was just the angle of the camera when I took the photo.)
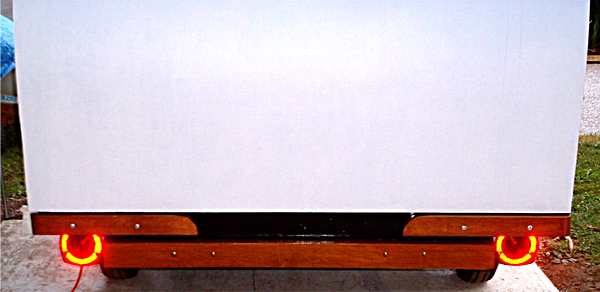
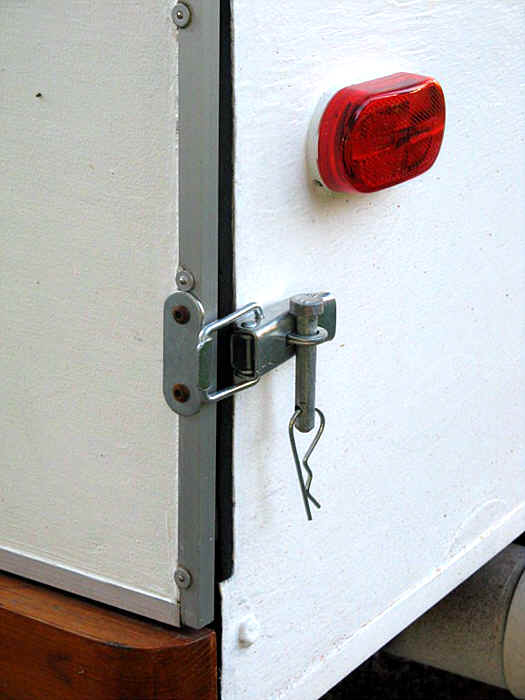
After using the Zephyr for two years, I added a latch on each side of the hatch. I ordered this from Austin Hardware. Before I had tied the hatch shut with a rope. It worked, but this is nicer.
.Please visit this sponsor